Posted on Leave a comment

Kumiko Jigs – Guide Blocks to make perfect wood latticework

In order to be able to make Kumiko, you will need a few jigs. The amount and types of jigs highly depend on the pattern you want to make and the needed angles on the infill pieces as well as the type of grid you will make. In this article, I am gonna demonstrate the jigs for the Asanoha-pattern in a square grid, since it is one of the most common patterns and is a good starting point for beginners. I did start with it, too.

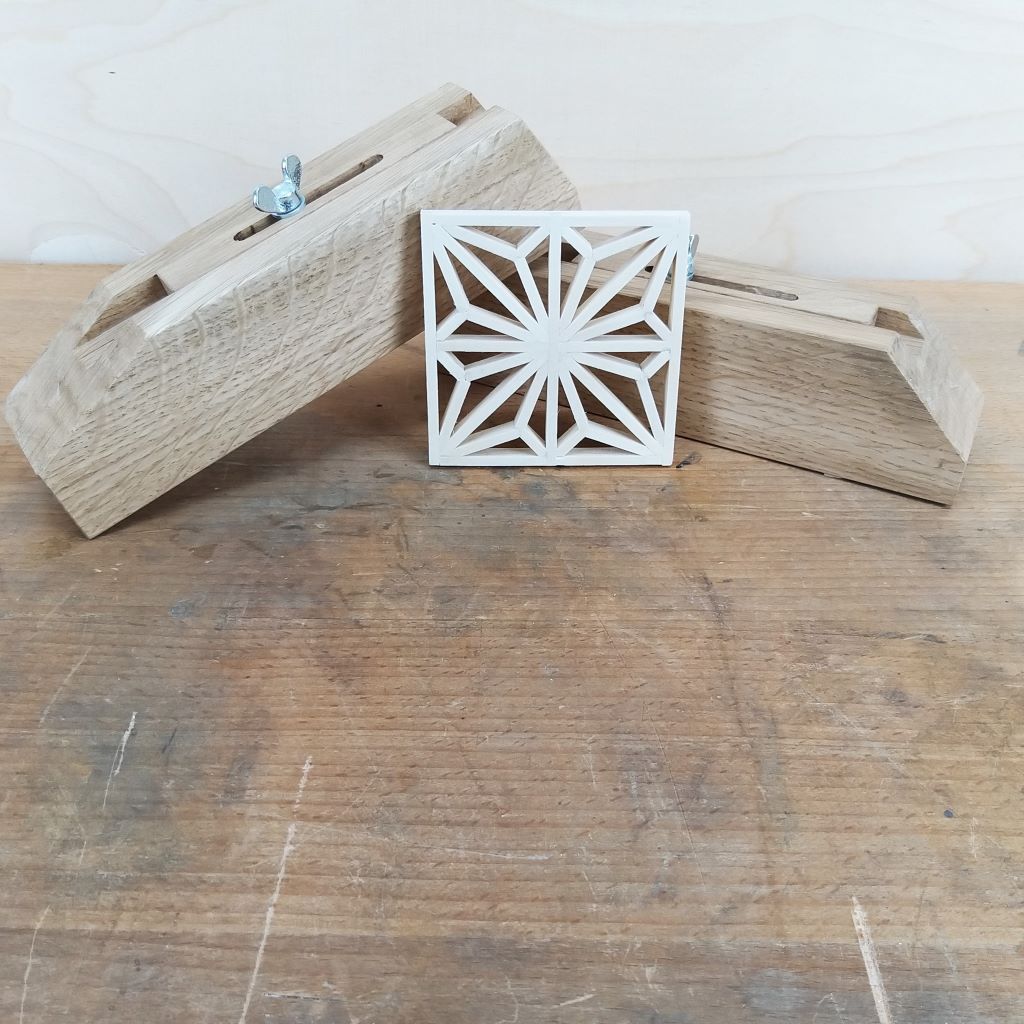
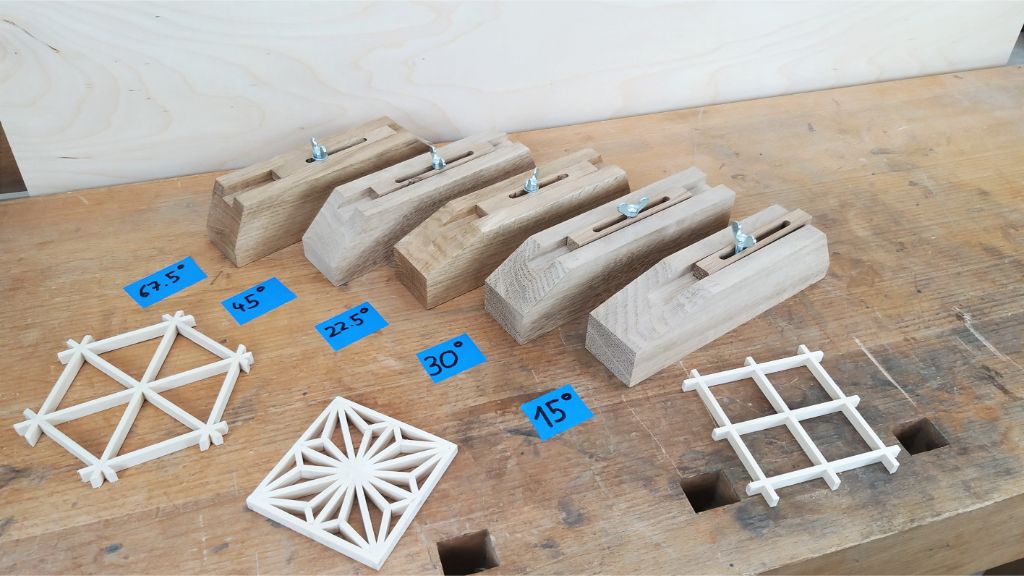
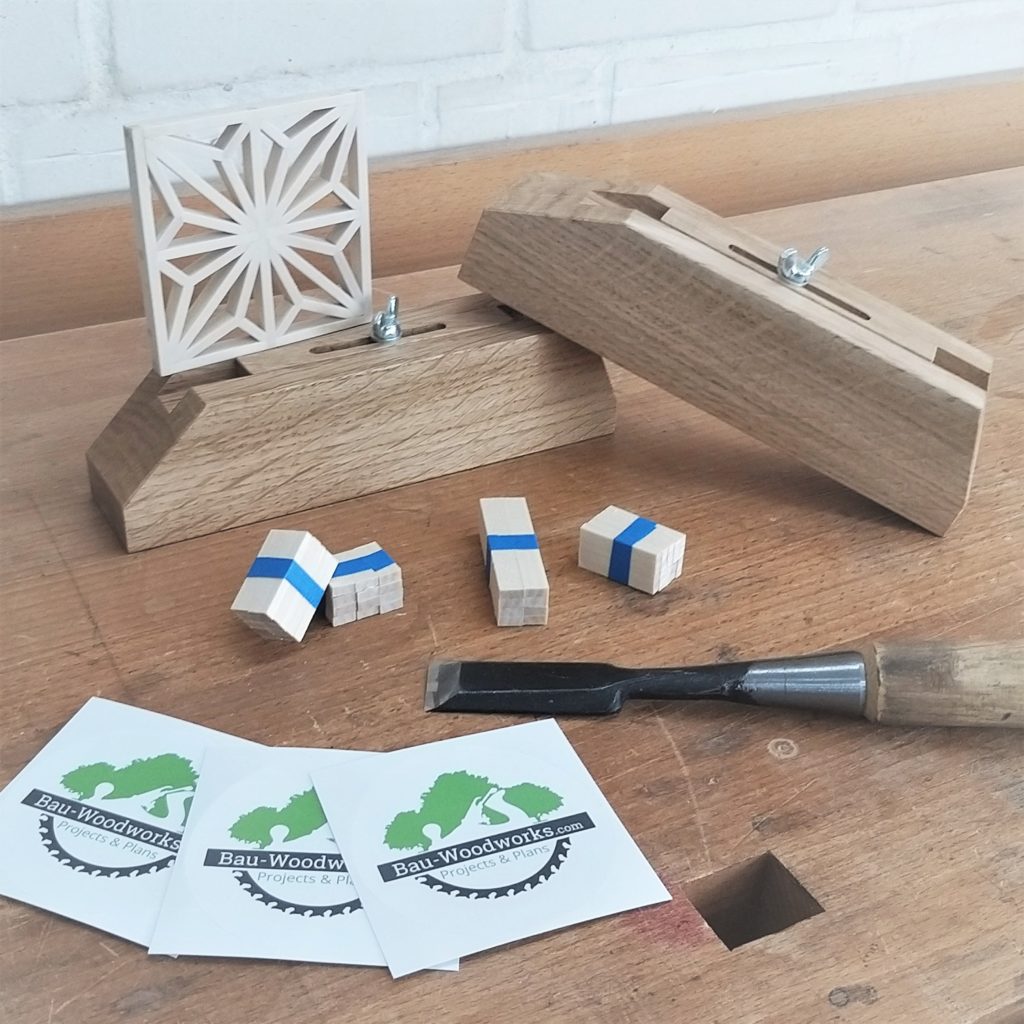
Kumiko guide blocks with a variety of angles at the end.

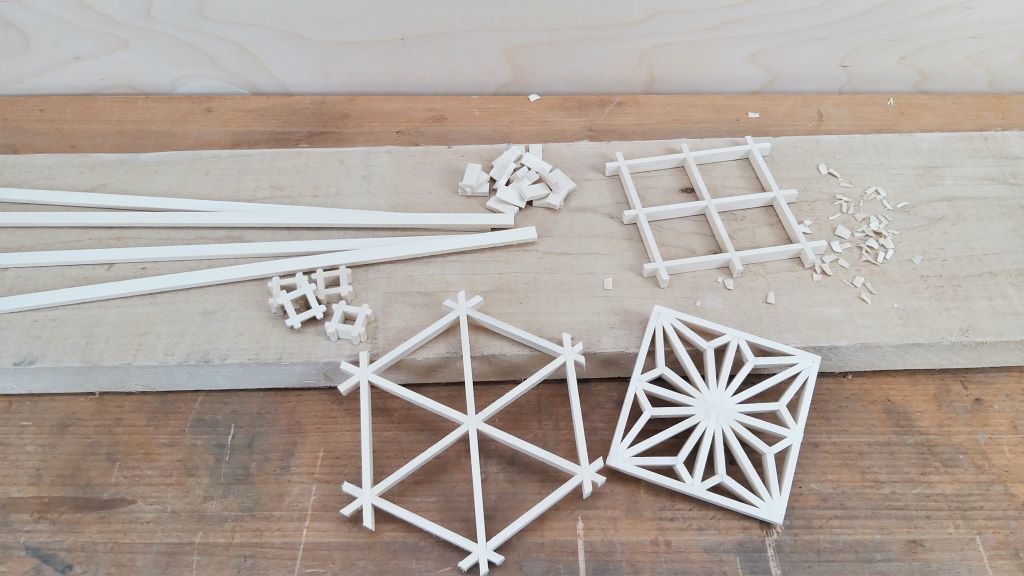
The Asanoha consists of a long diagonal infill piece (b), two smaller infill pieces ( c) and a small piece (d), that locks everything in place.

In order to fit perfectly together with the following angles on the pieces have to be cut:

a: 90-degree notch

b: 45-degree bevel on each side 

c: 22.5-degree and 67.5-degree

d: 45-degree on each side

The grid can be cut in a few different ways. There are two common ways. With a Japanese pull saw and a narrow chisel or on the table saw with a jig that is similar to a box joint jig.

I like the table saw way. It is fast, accurate and repeatable. There is a downside. The thickness of your strips must match the thickness of your table saw blade. In the picture below you see my jig. The little pin sticking out of the fence is the same thickness as the grid.

Note: The triangular pattern (Mitsukude) is cut on a different jig, but with the same principle.

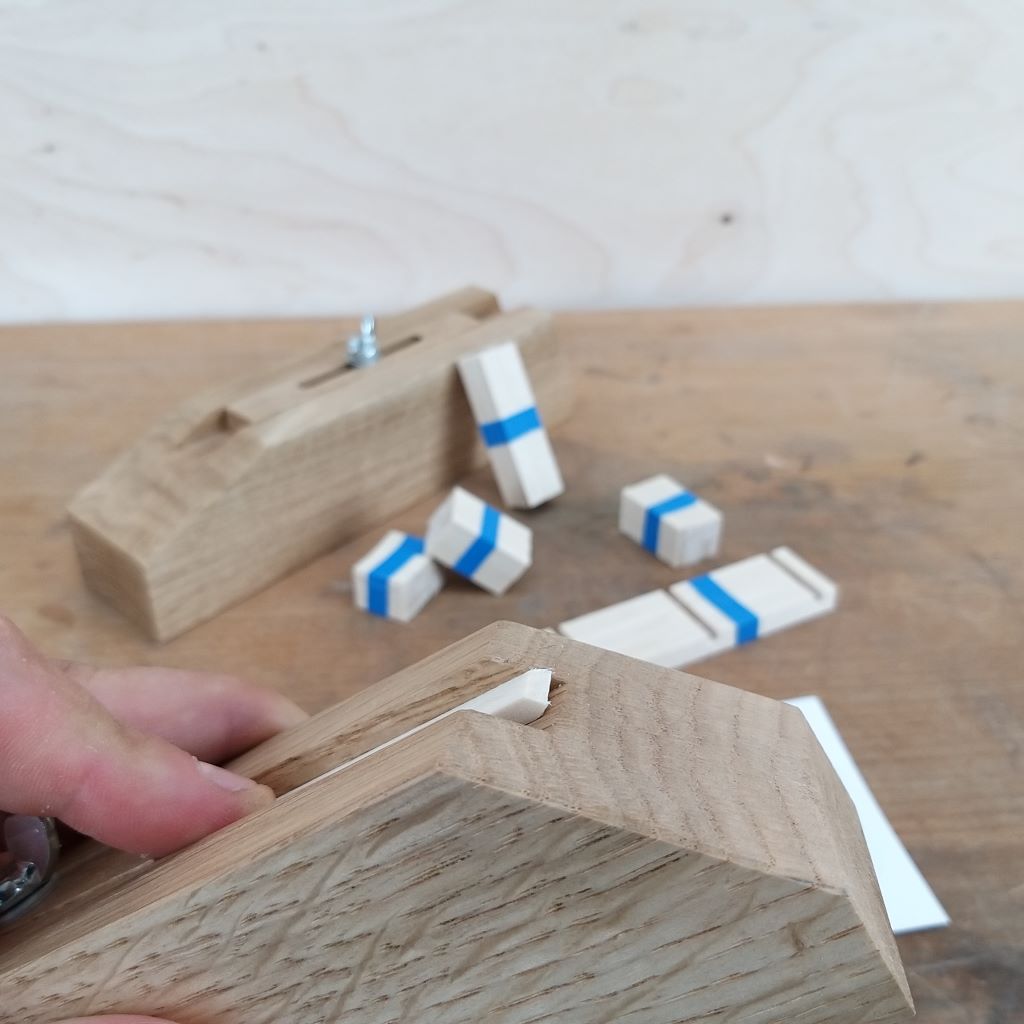
My preferred method of cutting the small bevels on the infill pieces is with a shop-made jig and a sharp Japanese chisel (I sharpened it 25 degree – Any angle would work but I found that 25 works best in terms of sharpness since durability is not really an issue when pairing only tiny pieces).

The jigs are essentially just a miter box with an adjustable stop, where the infill pieces stick out on one side and the excess gets cut by the chisel.

The jigs are made out of hardwood (I like oak for that). They are about 50mm (2”) by 45mm (1 ¾”) with an 8mm deep and 12 mm (½”) wide groove in the middle. The angles at the end match the angles needed for your pattern. 

The stop is held at its place with a wing screw going in a threaded insert.

For the Asanoha I like to make only two blocks with an angle on each side. Therefore it is important which angle is on the same block with another. You want to have one jig with 45-degree plus 67.5-degree and the second with 22.5-degree plus 67.5-degree on the other end. This makes cutting the smaller infill pieces ( c)  much easier since you are able to set both blocks with the 67.5-degree angle to different lengths. You can find more about how to cut the Asanoha pattern in my video below.
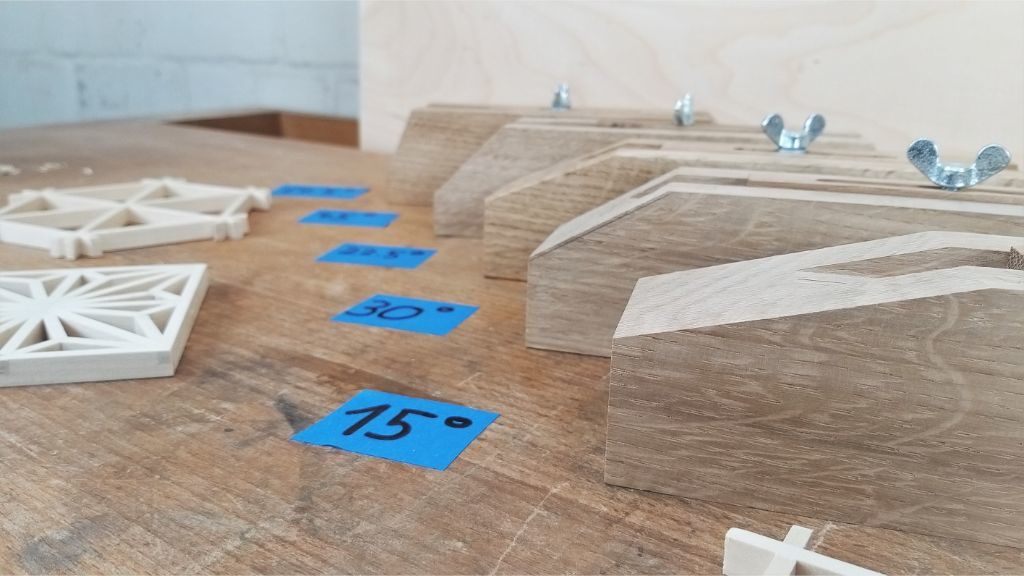
Kumiko jigs are an easy way to start your Kumiko journey.

If you decide to build your own jigs make sure the angles are dead on and the stop is adjustable to the lengths you will need, depending on the grid size.

Here’s is how I build the jigs

I start by milling an oak board to 45mm (1 ¾”) thickness and then ripping strips slightly over 50mm (2”) off it. The next step is to send them through the planer one more time in order to get perfect 45mm (1 ¾”) by 50mm (2”) strips. For cutting the groove I use a flat-top table saw blade and make several cuts until the groove is about 12mm (½”) wide.  A trick I like to use is rotating the strips 180 degrees between passes. Therefore you can make 2 cuts with each crosscut fence positions and it saves time setting up the fence. 

After the groove is cut, I mill some more strips to fit the groove. They should have a nice friction fit. The height is not so critical. I let them sit a bit proud of the groove because that makes it easier to adjust them when cutting the pattern. They receive a 5mm (3/16”) slot in the center, where the wing bolt goes through.

The main body of the jigs gets a hole in the center. The depth, therefore, depends on the threaded inserts you use as well as the length of your screws. After installing the insert, I wipe on a single coat of oil to protect them. 

Tataaaah finished are your Kumiko jigs and ready to build some awesome stuff.

Get your own jigs now

In my shop, I have finished jigs and Kumiko kits for sale. Give yourself a headstart and order one right away.

Posted on Leave a comment

Right wood for Kumiko – The best species for latticework

Choosing the right species for your wood latticework makes it much easier and enjoyable.

When I made my first Kumiko pattern I didn’t ask myself this question and started with oak. Why this was a bad idea, I am gonna explain in a minute.

Traditionally Japanese Kumiko work is made out of Japanese cedar or Japanese cypress, but not everybody lives in Japan and has access to that. Nor has it the right color for every project. 

Here I am gonna write a little bit about the best wood for making Kumiko. Although there is no definite answer to that question. As usual, it depends…

In general, you want to use boards with straight, tight grain and with as little color differences as possible. Since the Kumiko pattern itself is visually very striking, the quiet grain gives a more uniform and calm look. If you have different color tones in your infill pieces, you will see the beveled corners pretty clearly and the Kumiko will look like a bunch of strips thrown together instead of a clean pattern.

Another concern is the hardness of the wood. Softer wood will compress a little when you put the pieces together. A harder wood like oak will not compress as much and makes it harder to get a clean pattern. And that is exactly what happened to me. Choosing oak for my first pattern ever made it so much more difficult.

When you choose the wood you also want to take a species that takes an edge well and does not splinter as much.

That’s how you want it to look like. Clean edge without splinter.

Considering the facts here are some wood species to start with. 

The most known wood for Kumiko right now is basswood. It scores well on all the three factors above, is a great wood for hand carving and is relatively cheap compared to other hardwoods.

Another good choice can be white pine which is similar to basswood.

My favorite species for Kumiko is whitewood (yellow popular). My lumberyard was short of basswood and I told them what I wanted to use it for. They suggested whitewood and I gave it a try. I did not regret that move. It was so great to work with and the Kumiko turned out so good. Also, the availability and selection of whitewood at my lumberyard is pretty good. That makes it perfect for me.

Whitewood (Yellow Poplar) is my favorite wood for Kumiko.

Especially if you want to use contrasting species in a Kumiko panel or match the color of other components in your workpiece you may need to turn your attention to some other species. Cherry, oak, walnut and mahogany are also great for Kumiko. But since they are considerably harder, they are less forgiving, way harder to pair and it is more difficult to achieve a nice Kumiko pattern without gaps. 

Summary

You need a wood species that pairs well and boards with little defects, minimal color differences and straight grain. 

Basswood, white pine and whitewood are great woods for beginners in Kumiko. Cherry, oak, walnut and mahogany can be necessary because of color but are more challenging to work with.

Get your Kumiko Starter Kit now

In my shop, you find Kumiko kits for sale. Give yourself a headstart and order one right away.

Posted on Leave a comment

Kumiko Patterns – The different designs of the japanese wood latticework

Three different wood latticework patterns (Kumiko)

There are hundreds, maybe thousands of different kumiko patterns that are used not only by japanese woodworkers.

In this article, I want to show and talk about a bunch of them.

Note: I am gonna add pictures of every pattern as I build them and also more patterns in the future.

The base of the patterns is the grid (kaku). The grid can be made up of squares(), triangles (Misukude) or diamonds().

The Mitsukude and diamond grid are a little bit more challenging to make. The square grid is great for beginners.

Square patterns

How to make the square pattern

Asa-no-ha (more precisely kakuasa-no-ha)

Asanoha Kumiko Pattern in a square grid
Here I explain step-by-step how to make the Asanoha.

Asa-no-ha means hemp leaf in Japanese and shall mimic its shape. Kakuasa-no-ha just means square hemp leaf. In Japan the pattern is often used on the fabric of baby clothing and stands for strength as well as beauty. It is one of the most used patterns, although it is not that easy to make. 3 different infill pieces have to fit perfectly and a total of 7 infill pieces is needed per square. Angles are 45-degree, 22.5-degree and 67.5-degree.

Izutsu-Tsugi pattern

This pattern looks fairly simple. It’s a small square held by 4 diagonals at the corners. In order to make this pattern a 45-degree jig enough. It is pretty quick to make, too.

Triangular patterns around the Mitsukude

Asa-no-ha 

Asanoha Kumiko pattern in a triangular grid

The asa-no-ha in a triangular grid is fairly easy to make and one of the easiest patterns in terms of infill pieces. You only need one setting on the 30-degree jig and another on the 60-degree jig. One triangle gets filled with 3 pieces. Once the grid is done, this Kumiko pattern fairly quickly knocked out. In the Japanese believe that the aggregation of triangles protects against the evil.

Kuruma kikko

Kuruma means car in japanese or in this case wheel. Kikko just means that it is hexagonal.  

The pattern consists of the same piece over and over. It has 60-degree bevels on the end and two 60 degree half-lap joints on opposite sides. 

Sakura

The cherry blossom (sakura) is one of the most important symbols in the japanese culture and known as the national flower of Japan. So no surprise that there is a Kumiko pattern for sakura.

Sakura symbolizes beauty as well as mortality and is believed to predict that year’s harvest. It also kicks off the rice planting season.

The pattern consists only of 2 different pieces but needs 6 pieces per triangle. The bevels on the thicker pieces are 60 degrees and on the thinner pieces as well, but there are two on each end. 

The thinner piece can be joint either with a normal groove in the thicker piece or with a bird’s mouth joint.   

Goma gara

The goma (sesame) gara (pattern) represents the sesame flower. Sesame is pretty big in the japanese kitchen and Japan is one of the biggest sesame producers.

The pattern consists of the same piece (60-degree bevels on the end and two 60 degree half-lap joints) as the kuruma kikko but with different spacing for the lap joints. 

Goma-Gara in oak and whitewood

Kasane-Rindo (Gentian sequence)

Rindo is the gentian and this pattern derives from a sequence of gentian blossoms.

Gentian stands for sincerity, justice and tolerance. The roots of the flowers are used for medicine.

The rindo pattern is also made of the same piece over and over. It has a 90 degree half lap joint, a 15 degrees bevel on one end and 75 degrees on the other (the one closer to the half-lap).


Get your Kumiko Starter kit now

In my shop, you find Kumiko Starter kits for sale. Give yourself a headstart and order one right away.


Posted on Leave a comment

52 Boxes in 52 Weeks – Matt Kenney

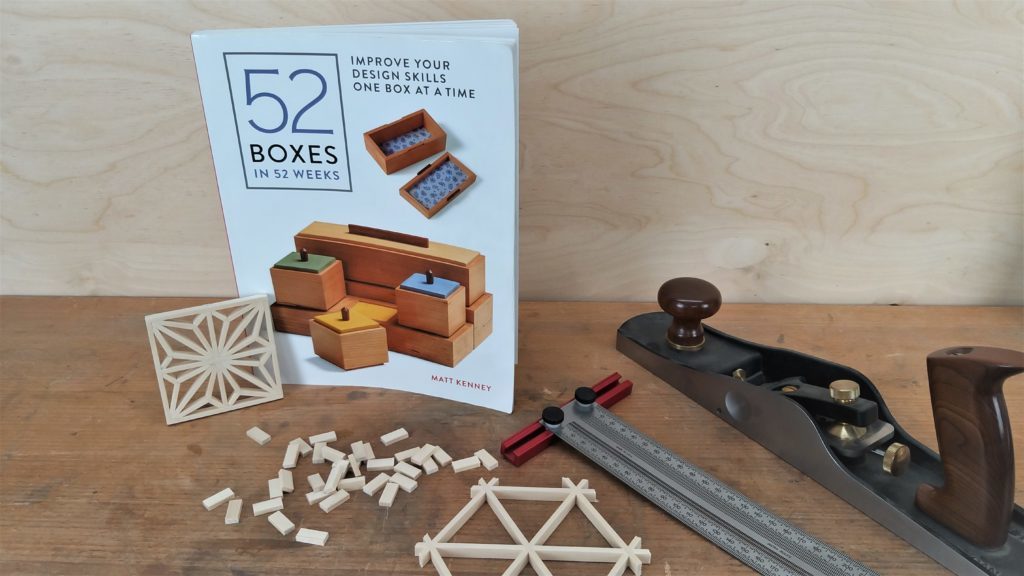
52 Boxes in 52 Weeks by Matt Kenney

I’ve heard about Matt Kenney’s 52 Boxes in 52 Weeks challenge way before the book came out. As he used to be employed at the FineWoodworking Magazin, he was part of their podcast ShopTalk Live and reported about his progress there. On the podcast his nickname was Captain Snark and he was known to build baby furniture a.k.a. smaller things. 

His main goal with the 52 boxes was to accelerate his design skills and build beautiful things in the shop. Boxes seem to be the perfect object for such a challenge, because they are rather quickly built, compared to furniture projects, while still having enough opportunities to make every box unique.

Since Matt is no longer with the magazine he started to teach more classes about box making, Kumiko and woodworking around the world and sells a few pieces of his work.

That’s about him, let’s get to the book.

Content

After a short introduction why he started the 52 Boxes in 52 Weeks endeavor, he continues with a chapter about design. The most important thing to him is good proportions of a piece. Namely length, width, height and the harmony between the sizes of every single part. Further, he talks about other design elements like the selection of wood, the use of fabric and color as well as why simple is beautiful. 

The next chapter is about box-making techniques and shows some really cool stuff. The heart of his boxes is the continuous grain that goes around all four corners with miter joints. He shows how he makes that happen (hint: you need to resaw for that) and his 2in1 crosscut-sled, he uses for that. The chapter also covers all other components of a box and how to make them, like a bottom that considers wood movement, a lid, a liner and how to finish a box in order to give a beautiful last touch.

Alright, then come the boxes themselves. Each of the 52 boxes is then presented on about 3 pages and he explains what he intended with each box as well as all the design elements of the particular box(es). A few boxes belong together and are therefore presented as a pair, trio or quartet. He defines the term box a bit more relaxed and it also includes a workpiece that is more like a shelf for a sake set.

Along with the pictures of the boxes he also gives away all the specs like wood species, size and used colors of each box. The sequence of boxes is loosened up with the demonstration of techniques, he used for a particular box and some hints about specific topics like working with cocobolo or more philosophical topics such as mistakes as milestones.

The book ends with a short afterword.

Layout

The book is published by the Taunton Press and since they are also the publisher of FineWoodworking, you can expect an equally high standard. It contains countless professional photographs on over 200 pages. The different colors of page elements, as well as different fonts, make it a joy to read or just thumb through.

Target Audience

The book is definitely geared towards woodworkers, who want to expand their design abilities. The design elements and principles are totally applicable for all sorts of woodworking. It also motivates to try out a new technique or spending more time and effort into the design of your next piece. 

It is a great book to have around and seek inspiration here and there when designing.

Conclusion

The beauty of the boxes struck me immediately. My favorite box is box 45, a tea cabinet with three drawers and a door with Kumiko. Although box 51 and 38 are very close to it.

I really enjoyed reading it. It took me way longer than another book with around 200 pages because I went back and forth to see what he meant with his design explanations and looked at every box pretty extensively. This pushed my understanding of design tremendously. I really hope this will come to life in further builds of mine. I will especially take more time to get the proportions better. 

Even if you never intend to build a box like Matt’s, you definitely do benefit from his design skills and will build more delicate and beautiful pieces in the future.

Posted on Leave a comment

Crushing It! – Gary Vaynerchuk

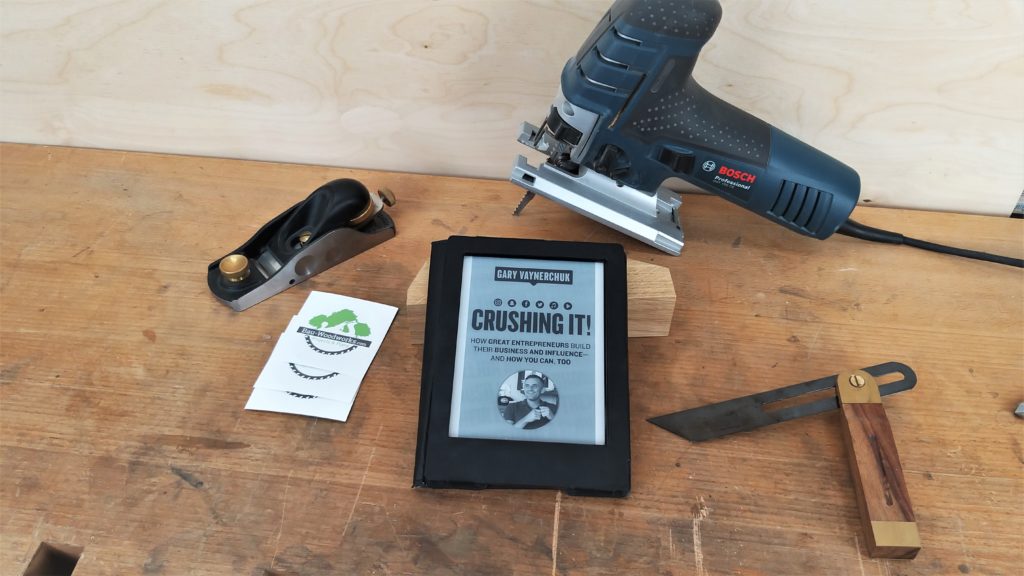
Crushing It! by Gary Vaynerchuk

On my family trip to Sweden I was looking for an ebook to read in the next few days because I love reading at the beach and had just finished Making Time from Bob Claglett. I decided that I will read a business book instead of a woodworking book since woodworking books often contain nice pictures and are therefore better as normal books.

As I was browsing through the online store this book caught my attention. I knew the author Gary Vaynerchuk from a few motivational speeches and thought this will most likely be pretty motivational, too. Of course, Gary Vee is very well known as an online marketing expert, investor, and entrepreneur, who has built several businesses including his parents’ wine store and a media company.

I had almost no expectations of the book and thought it would be an easy read and inspire me. 

I was quite wrong. 

Content

Gary separated the book into two main parts. 

Part 1 is called Get Pumped and part 2 Create your pillar.

The first is pretty much what I expected to be in the book,his own story as well as a lot of stories from entrepreneurs that succeeded and built or expanded their business because of social media. He also explains why he thinks that social media is and will even more become the place to be for brand building. In his opinion he only need a few online profiles, patience and considerably amount of hard work in order to build a brand and a successful business. 

His attitude towards hard work is pretty intense and he states that if you want to become successful in your niche working 16-18 hours a day may be required. One story that stayed with me is the one of a former sales representative of a pharmaceutical company, who tried to be an entrepreneur several times and finally achieve it by starting a youtube channel with his son about cutting things in half.

The second part is about doing it. He describes why starting a facebook business page is always the first step in order to become an influencer/online brand and what is takes to get discovered online by other people. Small hint here: It’s hashtags and joining the conversation.

This is followed by a chapter about each major social media plattform/channel. Namely, Musical.ly, Snapchat, Twitter, YouTube, Facebook, Instagram, Podcasts and Voice-First.

He explains why each network is worth the effort to be on as well as his best tips and tricks on how to approach it in order to gain followers.

Layout 

279 pages. All text, no pictures or graphics. There are a few links to pieces of online content, that are included into the story.

Target Audience

Since the book is focused on building your brand online and gathering a following, it’s for everybody, who wants to make more out of his/her career. It encourages you to follow your own path and that everybody can use social media in order to become successful, no matter in which field they are in.

Conclusion

Although I don’t agree with everything he wrote in the book, especially not the amount of work you should put in and the lifestyle he has, it was an eye-opener for me.

As a professional online marketer, I was more focused on Google Ads, Facebook Ads, SEO and On-Page Optimization rather than social media. After reading, I understood way better why social media is important in the mix. It’s for the long run. It’s not about getting a quick buck out of it. It’s about becoming a known person/company in your field and someone the people trust in.

Sometimes it feels a bit like this book is an ad for his first book Crush iI!. He mentions it all the time and all the stories are from people who have read Crush It!. To an extent, I found that there are too many examples of other people. But that may just be a personal thing.

Nevertheless, if you want to start your own business or take your brand/business/career to the next level, this book is a very good inspiration and simple instruction on how to build and grow it on social media. 

It is much more than just a little motivation to get off the couch and start planting your success. It has definitely changed the way I approach my social media game. I really liked the actionable steps in each chapter about the platforms and put them to use.

Posted on Leave a comment

Making Time – Bob Claglett

Making Time by Bob Claglett

I don’t think this man needs any further introduction, but I’ll try it anyway.

Bob Claglett is the founder of I Like to Make Stuff (ILTMS) and one of the most recognized makers with more subscribers on YouTube than Jimmy Diresta and April Wilkerson. Combined (June 2019).

He was one of the first makers to do content creation as a full-time gig and has countless incredible projects under his belt. Varying from simple shop projects and home improvement to building incredible comic props and movie gadgets like the blaster of Optimus Prime from Transformers.

His book Making Time caught my attention because I wanted to know how he started his incredible journey and learn a thing one or two from his experience as a content creator.

Content

The book consists of two main parts and a short introduction.

The first part is about his journey from a full-time software developer that built projects as a hobby on the weekend to starting his own business with content creation and following his true passion. You can get a pretty good look into how he started his complete online journey and turned it into a profitable career.

In the second part Bob describes his approaches and thoughts as a successful content creator. They reach from the vulnerability, you expose yourself to when uploading videos to how he treats incoming sponsoring requests and the responsibility he has as an influencer. This chapter has a lot of small tips and tricks if you want to start your own online business.

Layout

The book is laid out pretty simple but effective. 79 pages without any graphics or pictures. It is an easy read and doesn’t take up more than a few hours to read

Target Audience

Bob got the same questions about how to start or grow as a content creator over and over again. This book is his approach in answering them and showing what it takes to be a full-time content creator. So everybody, especially in the maker space, that wants to start his online content business or seeks ways of expanding and maximizing productivity is definitely at the right place here.

Conclusion

At first, I was a little bit disappointed because the book only had 79 pages and the price is still the same as books with 150 or more pages.

But his direct and honest way of telling his own story definitely makes up for that.

I found the book fun and easy to read, while still giving me a good impression of how he started turning his passion into a way of providing for his family. Makers of all sorts and content creators will find inspiration in his story and the chapter about his processes changed the way I organize my projects.

Posted on Leave a comment

The why and how of woodworking – Michael Pekovich

The why and how of woodworking by Michael Pekovich

This book has been on my wishlist long before it was published and I was really excited when it finally arrived.

Michael Pekovich is not only one of the most inspiring furniture makers out there, but he is also Creative Director of the worldwide famous magazine Fine Woodworking. Everybody who has watched one of the videos or listened to Shop Talk Live knows he can convey his knowledge in a very clear and comprehensible way.

So my expectations of his book were very high. Read further to see if they have been met.

Content

After a short introduction about why he has written the book, the author starts in the first chapter with his 12 rules, how he uses his limited time in the shop efficiently and to his fulfillment.

The second chapter about Design gives insights into his own design process and he encourages everybody to put more effort in the design of a furniture piece since not every piece or idea is really worth building. Mainly because the time in the shop is not endless.

Pekovich dedicates the third chapter to the bare essential hand tools for woodworkers. He also explains the use of them, how he sharpens chisels and plane blades as well as how he cuts dovetails.

The next 4 chapters are each about a different furniture type. and show wall cabinets, boxes & chests, casework and tables.

The chapter about wall cabinets shows the impressive evolution of one particular piece over time, which Pekovich has built over and over in order to reach perfection. An introduction to the Japanese art of Kumiko is also included.

After he explains the construction and build process of a small Kumiko box, there is this gorgeous Wenge tea box. The Wenge is structured and the lid is held in place with magnets in two ebony strips attached to a wrapped cord. The box is followed by one with drawers and a sliding door. Very interesting are also the clever techniques and processes for making boxes he uses and explains in this section. The chapter is round off with another two boxes for tea utensils with Kumiko.

Casework has the greatest variety of projects in it. It starts off with a simple shoe rack that also acts as a bench, built out of a sheet good. In the third time making this piece, Michael perfected it and now it has 4 drawers underneath the seat. He also tells the very authentic story of a bookcase, with which he has never been happy, that turned into a case with two drawers over time. The next piece is an oak and butternut dresser with 7 drawers. He used a lot of double tenons and a special version of the bridle joint.

Layout

The 224 pages of the book are full of high-quality pictures and beautiful graphics. It is always a pleasure to just flip through the book and take a look at the photographs. Because of his job, I guess it is no surprise that Michael wanted to do the layout of his book himself. The similarities to the Fine Woodworking Magazin are clearly visible and of the same high standard.

Target Group

This book is suited for beginners as well as experienced woodworkers.

Beginners will value the sections about hand tools because they show in a comprehensive way all necessary in order to have fun and good results in the shop.

Advanced woodworkers will discover clever jigs and processes as well as design inspiration.

Every woodworker can benefit from Pekovich’s way of making the most out of short time windows in the shop.

Conclusion

I really enjoyed reading this book and was especially overwhelmed by the way Michael Pekovich wrote about the design of his pieces. I will certainly incorporate some of his techniques and processes into my future builds.

Because of the beautiful pictures, it’s already worth it to let it sit on your coffee or couch table and just thump through it once in a while.

All in all, it’s definitely a must-read for every woodworker regardless of his/her level and a good start for someone who wants to get into the craft or perfect his skillset.