
Welcome back to part 2 of the bed series. If you’ve missed part 1, make sure to check it out here.
This article is sponsored by Osmo and contains product placement.
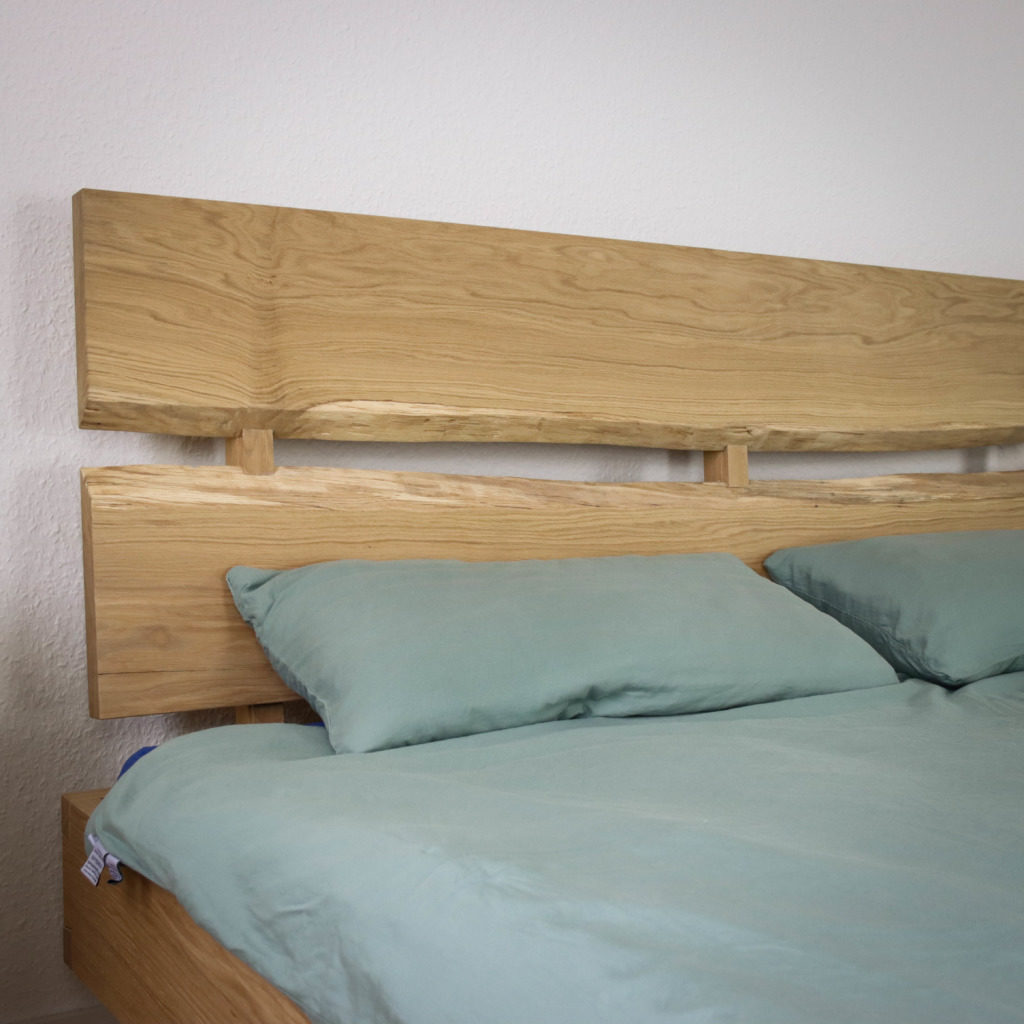
Making the live-edge headboard out of 2 slabs
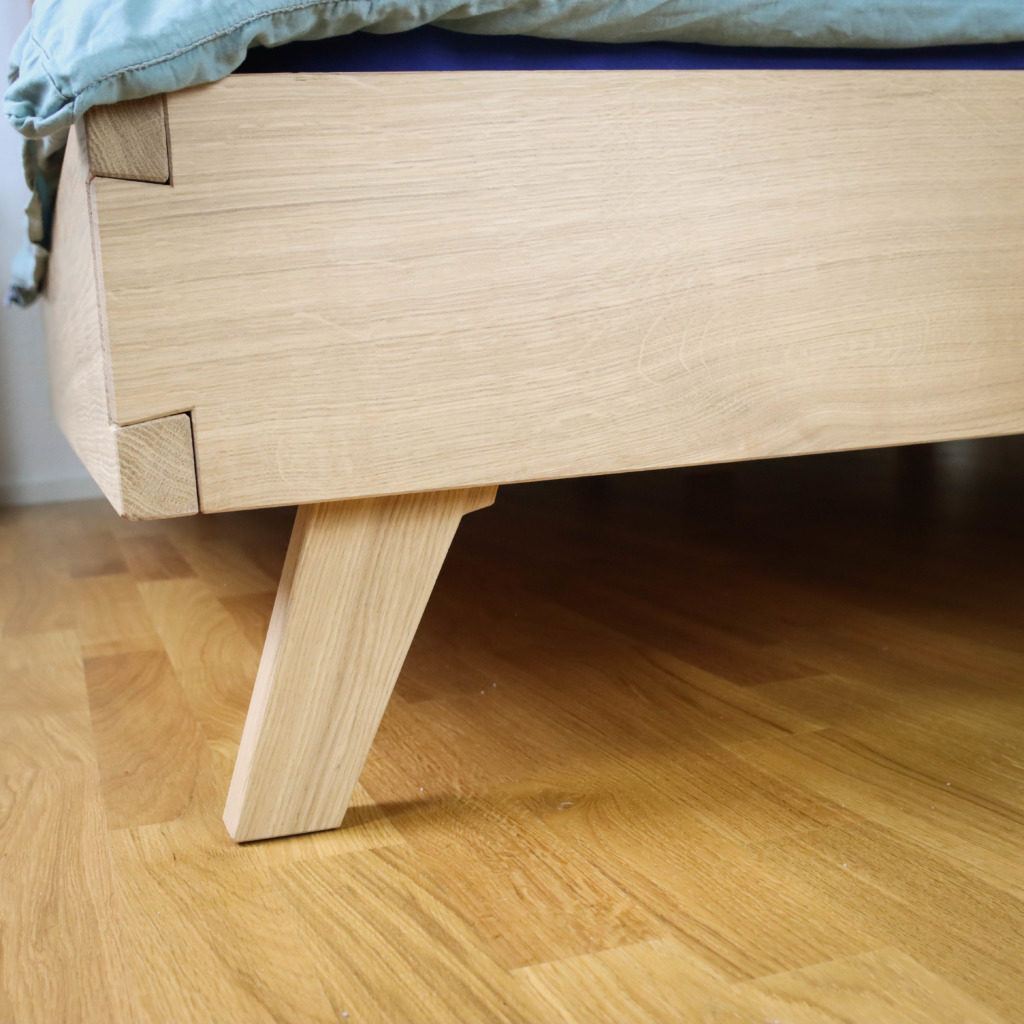
Creating the feet with a template
I was a little bit anxious when it came to the headboard. Sliding dovetails, angled legs and the sheer size seemed like a good challenge.
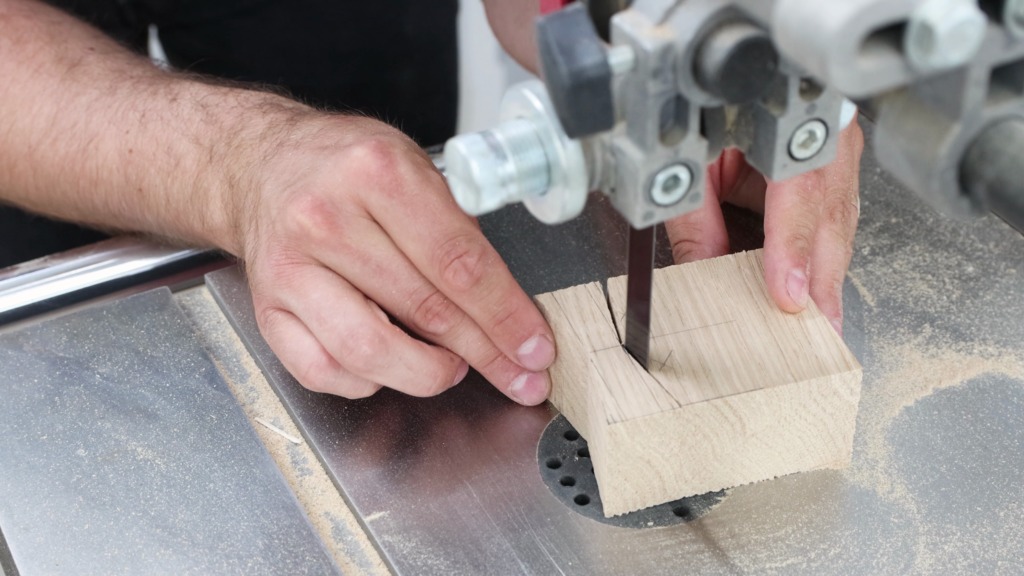
The angled legs lean back at a 5° angle. I created a template out of plywood by drawing the shape on the plywood and cutting it out at the bandsaw.
If you want to build this bed yourself, check out the plans I offer. They include all measurements, as well as instructions on how to resize it for your mattress size.


I traced it onto the three blanks for the legs. After sawing just a bit shy of my line, I secured the template with double sided tape to it. On the router table I used my biggest flush trim bit to complete the legs.


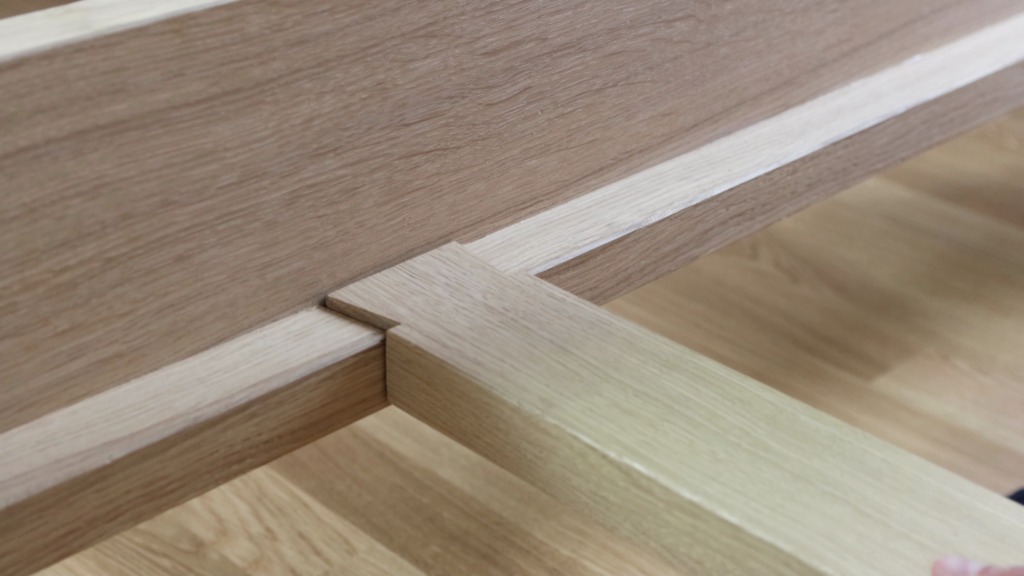
Sliding dovetails with the router
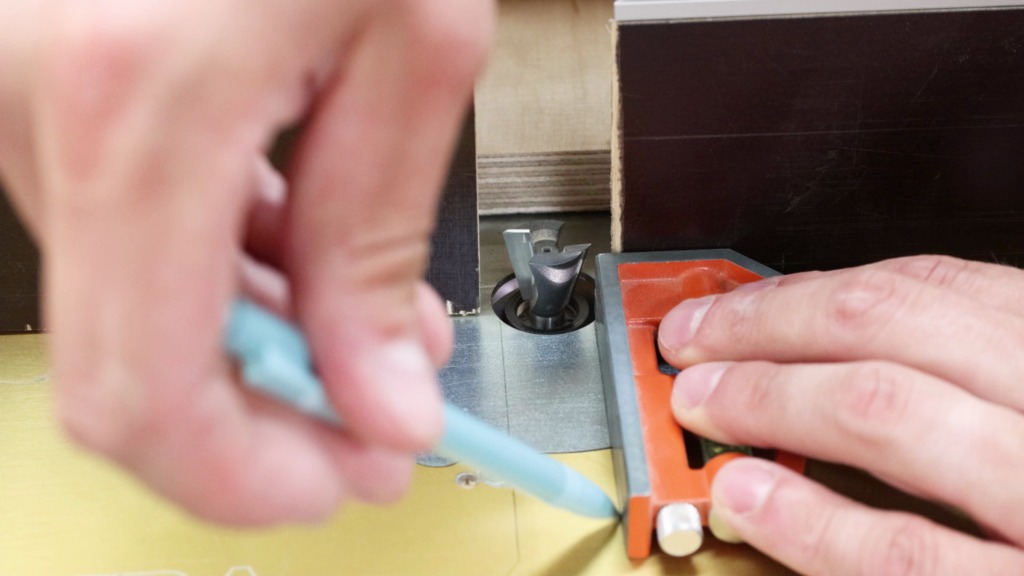
I marked the apex on the legs, which will help to route the sliding dovetails on the two parts of the legs. At the router table I used the head of my combo square to draw lines at both ends of the dovetail router bit. With that setup I was able to start or end the cut at the right point.


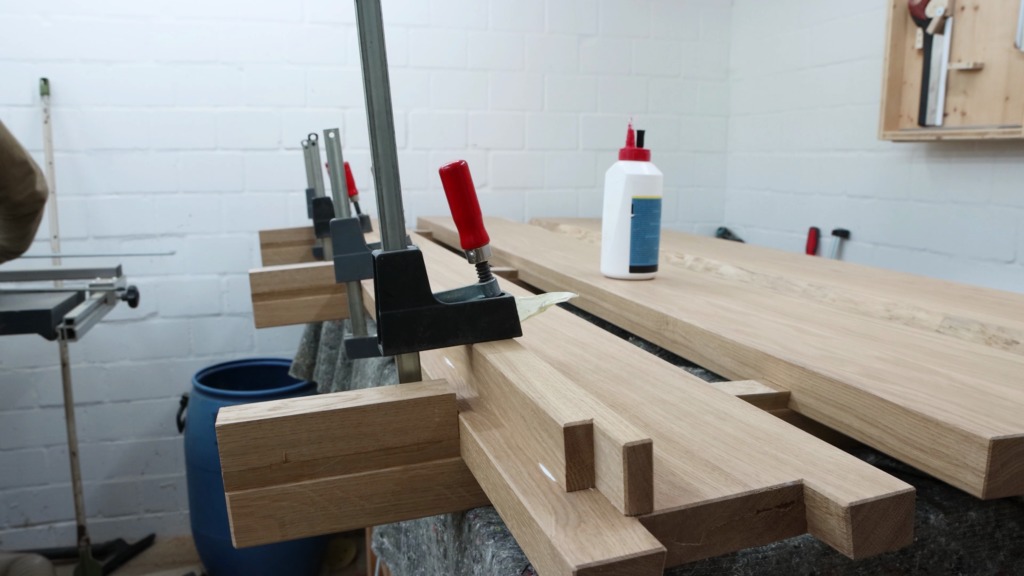
The two slabs on the headboard have a gap between them that creates the river effect. To secure them for routing the sliding dovetails I left them longer and screwed them together with a strip of plywood at each end.


I marked the location for the sliding dovetails and set my router up with a big straight bit. I used a digital depth gauge to set the depth stop of my router to the height of the dovetail part of the joint. I aligned the track of my track saw and with a special router attachment I could ride the router along the track. I did several passes to achieve my desired depth. By going with the straight bit first I made it much easier to create the dovetail shape since the dovetail bit only has to take away that small triangle at the side and you cannot do it in several passes with the dovetail bit because of its shape. You would end up with an odd shaped dado. After the first cut with the dovetail bit, I used the width adjustment of the track attachment to dial in the fit for the sliding dovetail. I simply did the math by measuring everything with a digital caliper and it worked flawlessly. I only did a testfit for the first couple of centimeters because getting the pieces apart would be a huge pain. Before I was able to cut the slabs to length at the miter saw, I removed the 2 temporary plywood strips.


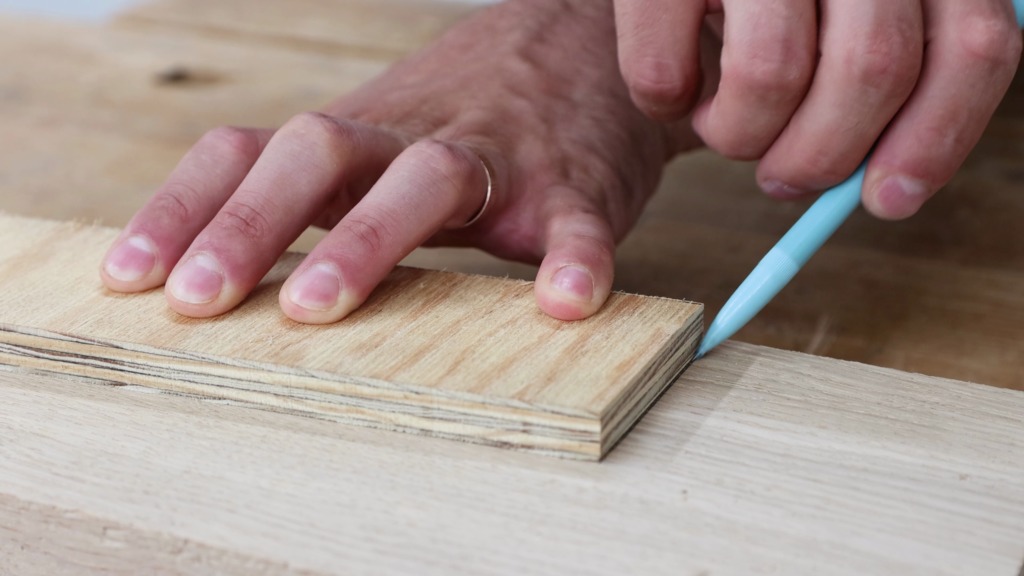
To make the live-edges more pleasant to the touch, I used a draw knife, a nylon brush chucked into my drill and some good old sandpaper.
Fixing a crack in the slab for the headboard with a bow-tie inlay
One of the slabs had a small crack in it. To fix it without being noticeable on the final piece I decided to go with a bow tie inlay from the back. On a piece with straight grain, I laid out the bowtie and cut it at the bandsaw. I traced the shape of it with a marking knife and made the lines more visible with a pencil. With the router and a straight bit, I removed the majority of the waste. I made sure to not touch the lines. Cleaning it up with a chisel and mallet is super fast. I like how this process combines the use of power tools and hand tools to a much quicker operation. After spreading some glue, I drove in the bow tie with a mallet. By having the bowtie thicker than the reveal is deep I can make sure the bowtie goes all the way to the bottom and I don’t have to worry about it getting in deeper than the surface. I took care of the protruding bit with the flush-cut saw and the block plane.


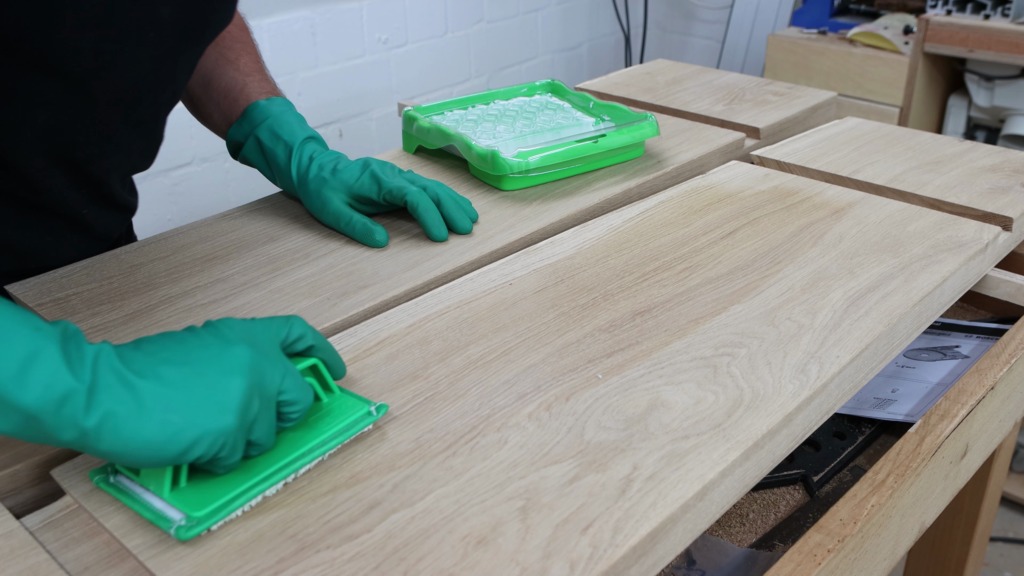
Finishing the bed with some Osmo
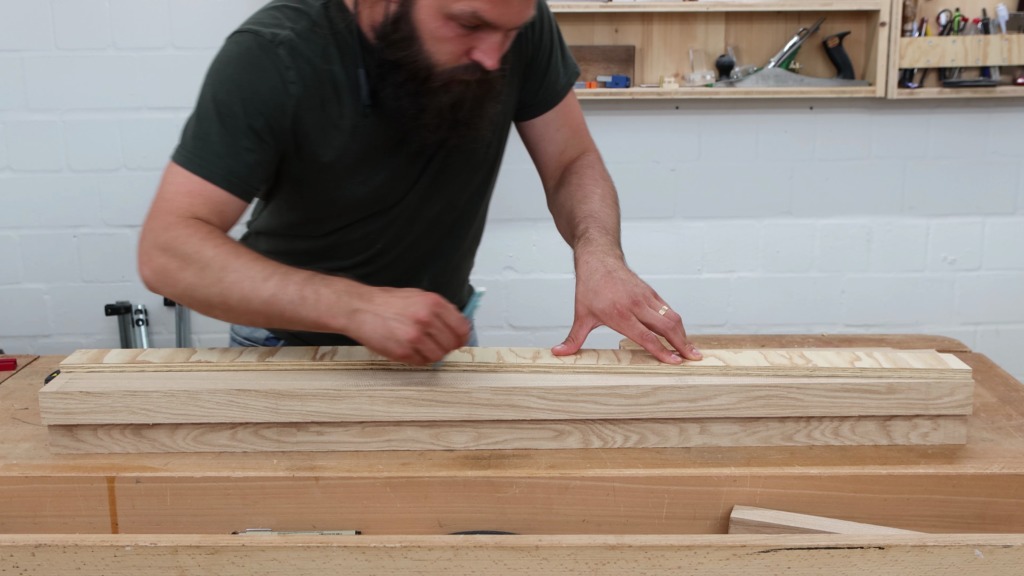
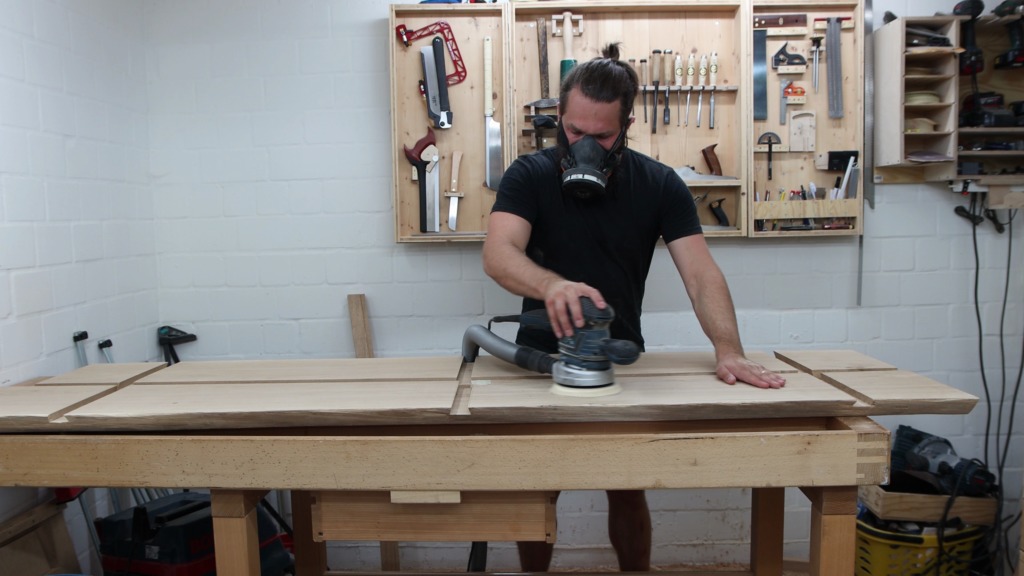
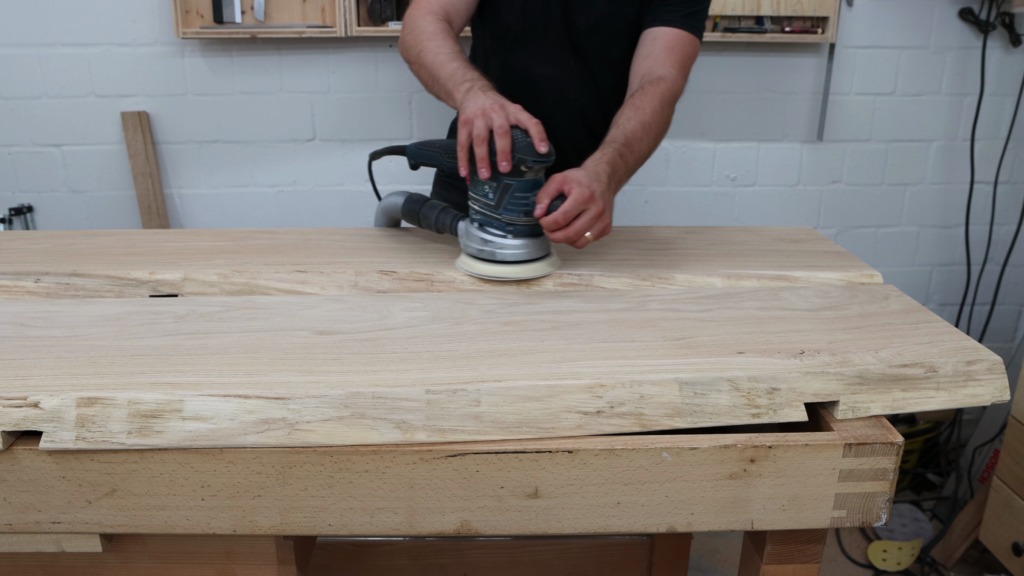
To get a nice surface I started my finishing process with a 120 and 220 grid sanding. Then I wiped all surfaces with a wet rack and did another sanding with 220 grid. I also gave all edges a small chamfer.


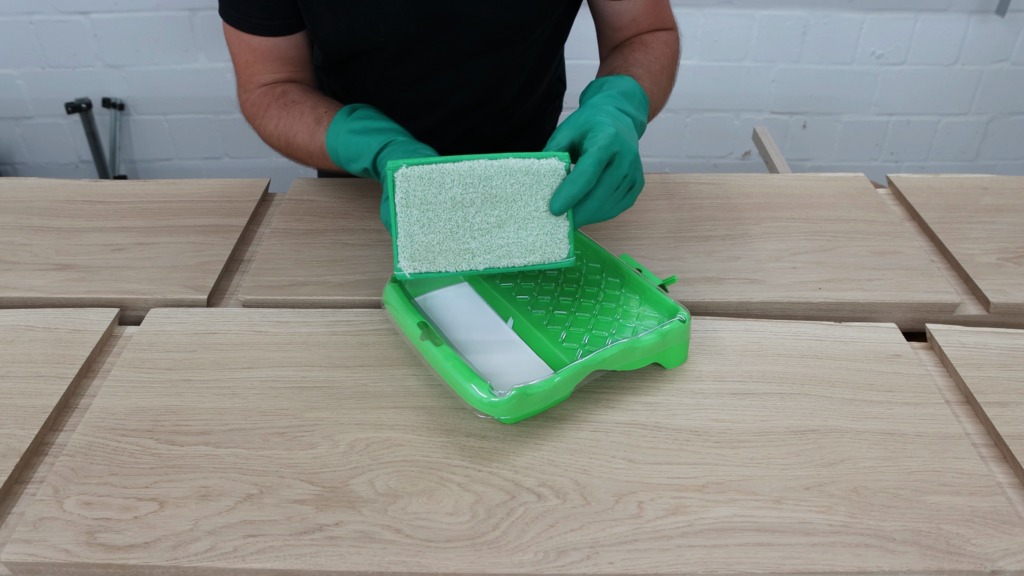
I decided to go with Osmo TopOil Natural and applied it with their handpad. This thing really makes finishing bigger projects like this a breeze. Of course I did not cover the areas that will be glue lines later on.
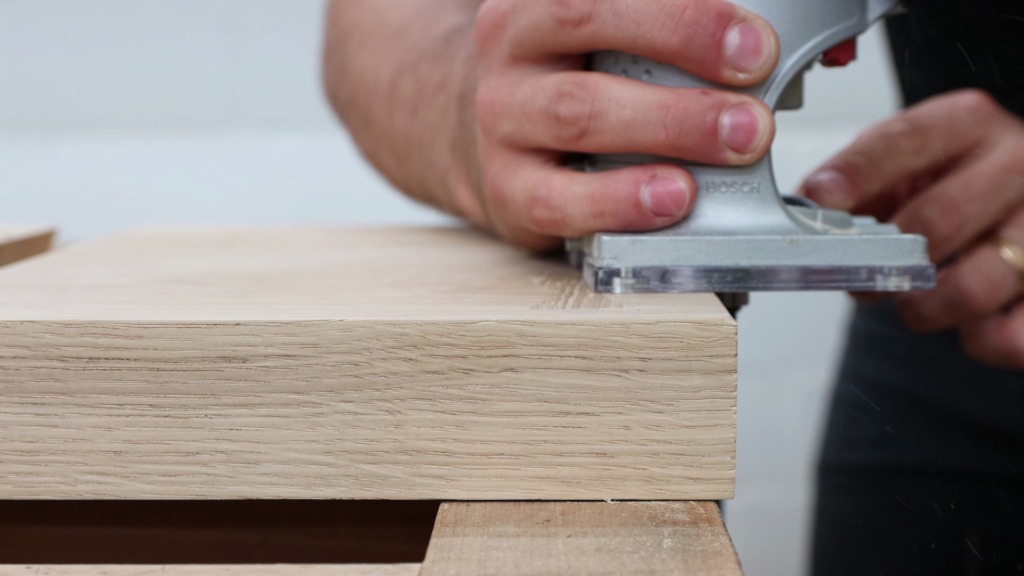
Before the second and final coat I very lightly sanded the parts with 400 grid sandpaper. The surface almost feels like glass with that process.


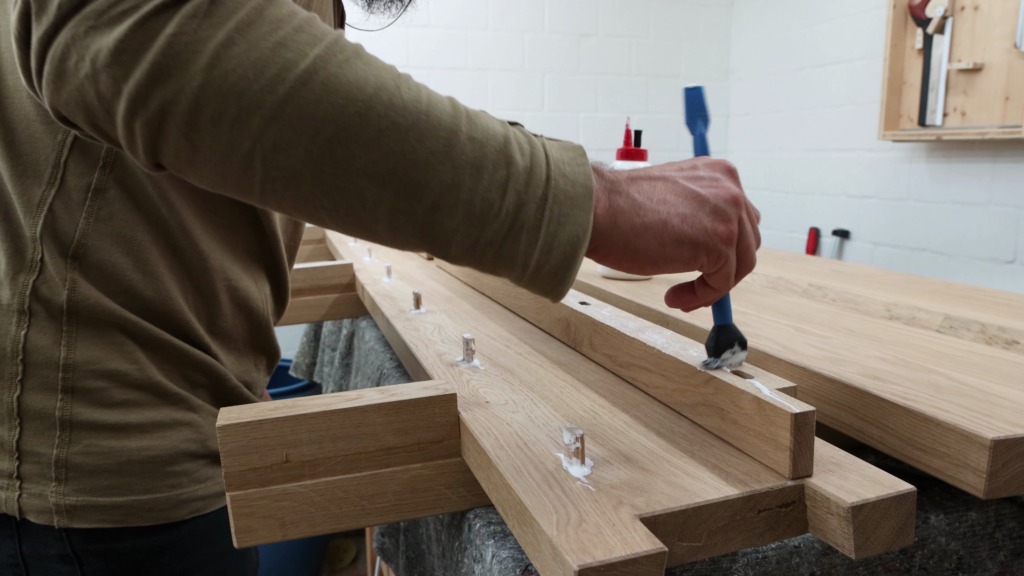
Assembling the headboard and gluing the slats in place
Now comes the most violent part of the build. Getting the sliding dovetails together. I protected the legs with a block of wood and hammered them in. First with a mallet and then with a good sized hammer.


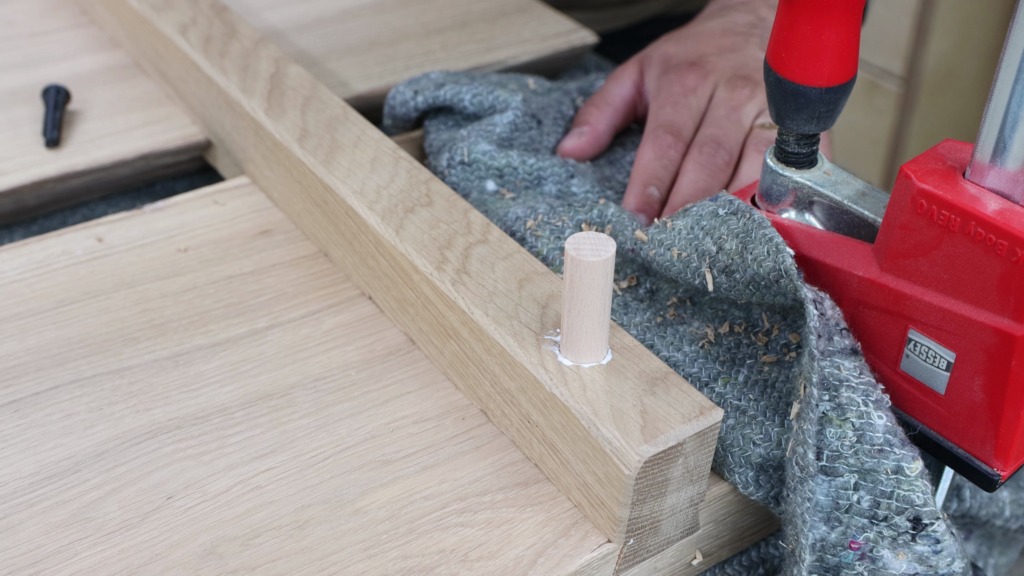


To prevent the slabs from sliding down the legs I secured them with a dowel from the back. It is important to only use one dowel per slab and leg, because otherwise it would restrict the seasonal wood movement of slabs and they can crack.
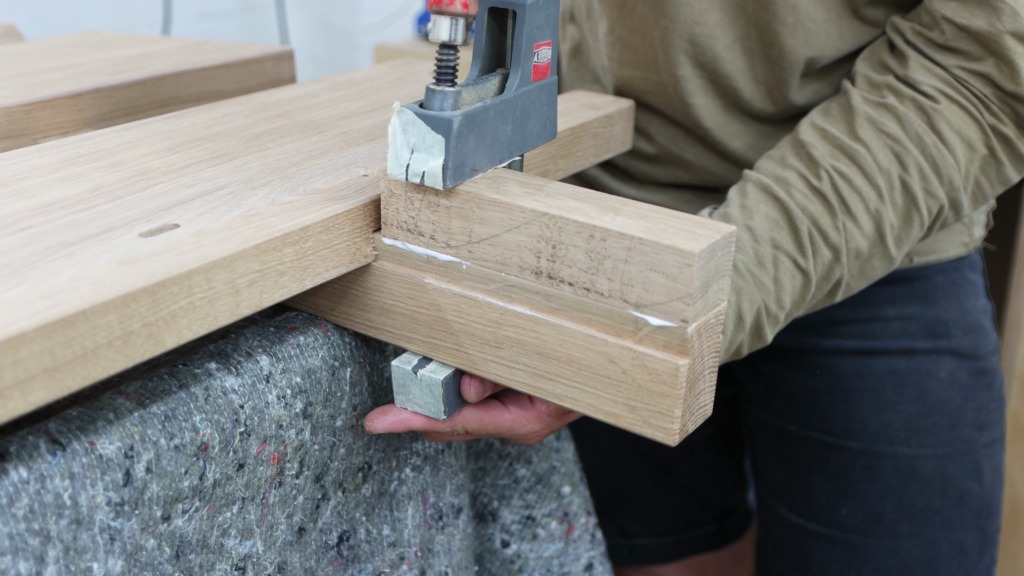
The frame piece for the back also has the three slots for the sliding dovetails, which I created with the same process as I did on the slabs. This part gets quite some weight on it and I think securing it with a dowel like the slabs would not be enough. Therefore I glued 3 blocks with a few dominos in it to the legs underneath the frame part. The dominos only help with alignment. Then I used this metal hook that is meant to install flooring to get the frame part back onto the blocks.
The final step was to glue the slats that hold the slatted frame to the frame of the bed.
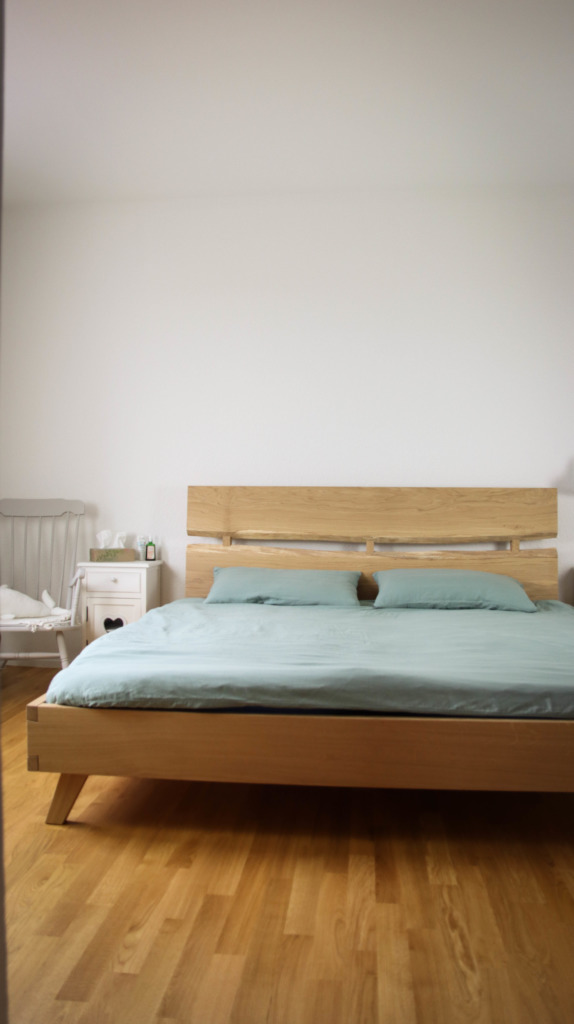
The live-edge bed is done
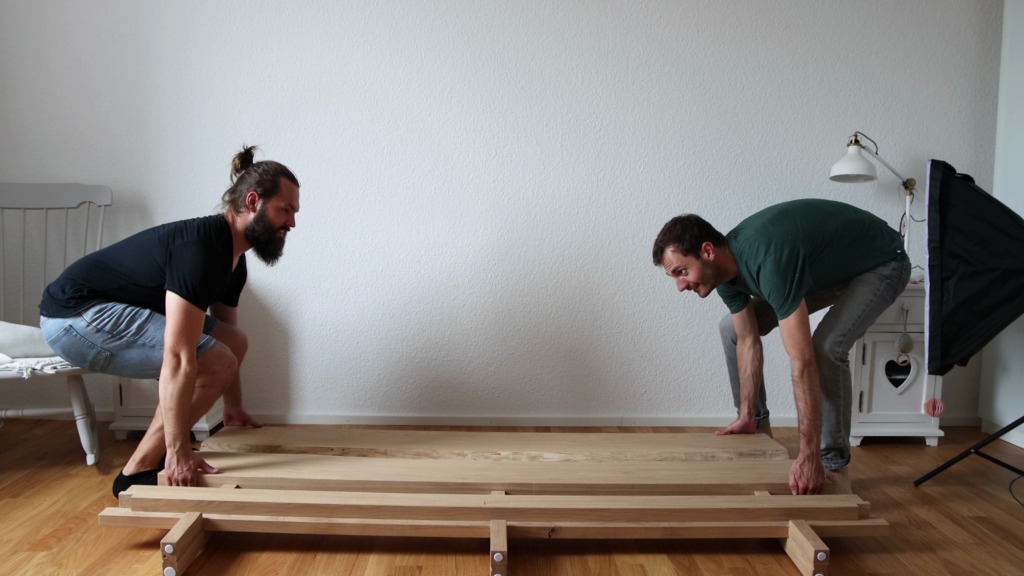
Time to assemble the bed for the first time and I was so excited. Assembling the bed just takes 3 minutes without any tools and is one of the most satisfying things ever. After installing the slatted frames and mattresses it was time for test roll by the new owner!


I really love how this project turned out and it was my first big project in which I didn’t make a mistake that would change the final design or construction of the piece.


Plans for this build
If you want to build this bed yourself you can find a complete set of plans for it here. In there you have all the measurements and shapes for the parts as well as instructions on how to size the parts if you go for another mattress size.